

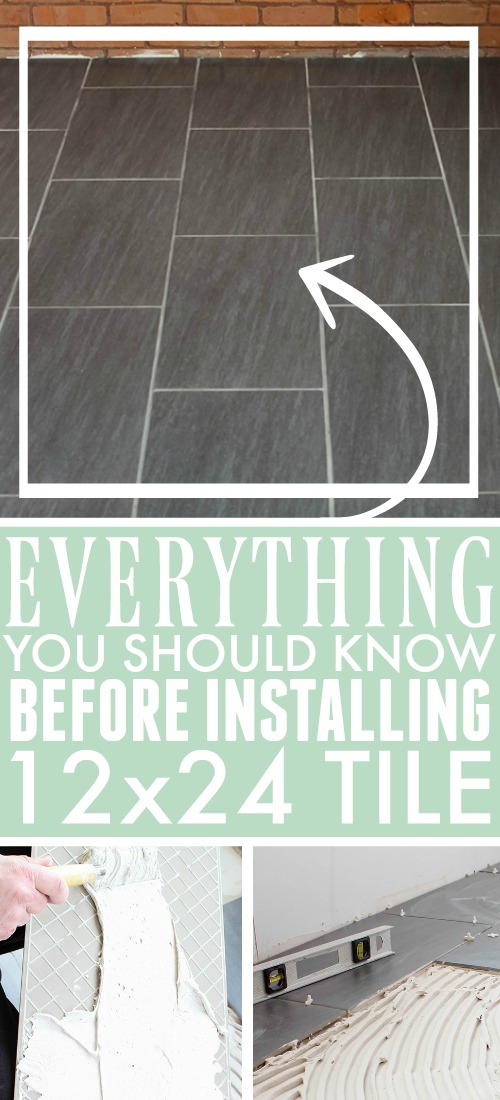
How To Install 12x24 Porcelain Floor Tile
Installing 12×24 tile can be a little catchy compared to smaller tiles, but with a piddling planning, and a few tricks up your sleeve, this can be a great DIY project even if you don't have a ton of tiling experience.
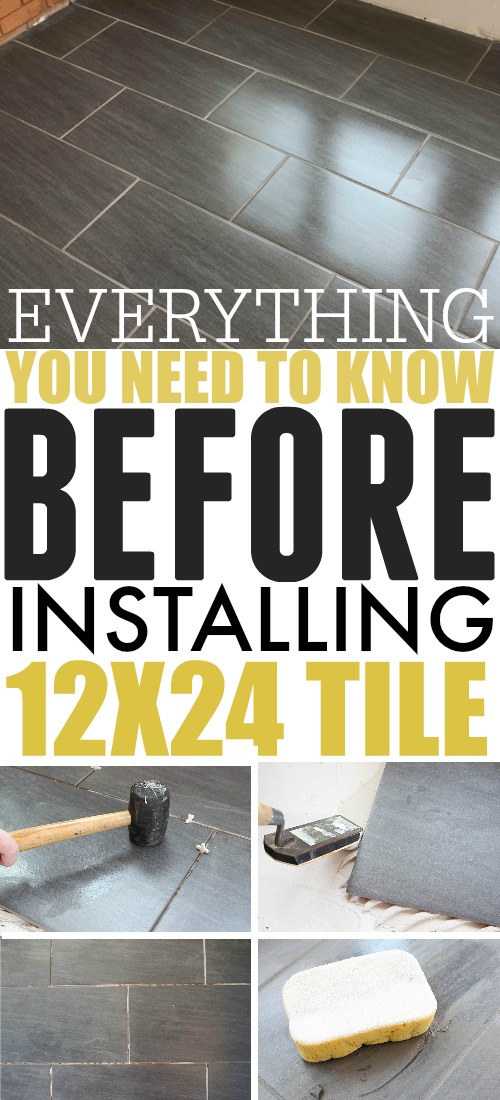
12 10 24 tile is everywhere lately. When we installed information technology in our bath a few years ago, it seemed similar kind of a fun, more modern selection, only now it seems to take pretty much become the standard for new tile floors everywhere. I've seen it used a lot in commercial applications besides as in a lot of homes and information technology doesn't look like it's going anywhere any time soon. I really love the await and immovability of 12×24 tile flooring and so I definitely think information technology'south a great choice. Information technology is, however, a little trickier to install than the more than traditional 12×12 tiles.
Since we merely finished installing 12×24 tile in our mudroom, I idea now would be a great time to go over some tips that we've learned. Hopefully we can brand your tiling experience a little easier and a little more successful!
Installing 12×24 Tile: Focus on Keeping Things Level
When you're working with giant tiles like these, getting (and keeping) everything level is pretty much the biggest claiming. Y'all need to make each individual tile level, but you besides desire to make certain that all of the tiles are sitting evenly and at the same height as 1 another on pinnacle of the mortar.

Before y'all become started, make sure you lot have a pocket-size 24 inch-ish level and then that you can check how each individual tile is sitting. A larger iv-5 human foot level is also super helpful for checking how level your floor overall is, and when comparing the tiles to each other. Have a prophylactic mallet handy to tap tiles for slight adjustments.
These tile lash systems are also super helpful because they automatically line the tiles up to each other as you go and make sure your floor is perfectly smooth. Nosotros didn't cease up utilise the lash system this time, just we used information technology final time we installed this type of tile and it actually helped keep us in line.
We've as well noticed that if you mix your mortar to be a little bit on the thicker side, it's much easier to reach and maintain levelness. If y'all're getting a chip frustrated with how difficult it is to make things level, try making your next batch of mortar a trivial thicker.
Use The Correct Mortar for 12×24 Tile
You oft hear about using "sparse set" to install tile, but in the case of installing 12×24 tile as floor, you'll want to apply something called "medium bed" mortar. The medium bed holds its consistency better than the thin gear up, which will sag a scrap in the centre of the tile. If y'all use the thin set up, your tile will end up beingness unsupported and unattached in some areas equally everything dries and sets upward and this could lead to loose tiles.
Tools and Tips for The Actual Mortar Application Process for 12×24 Tile
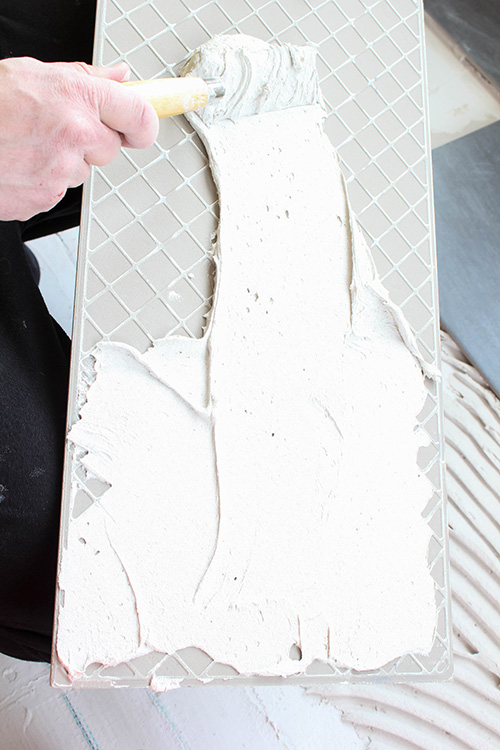
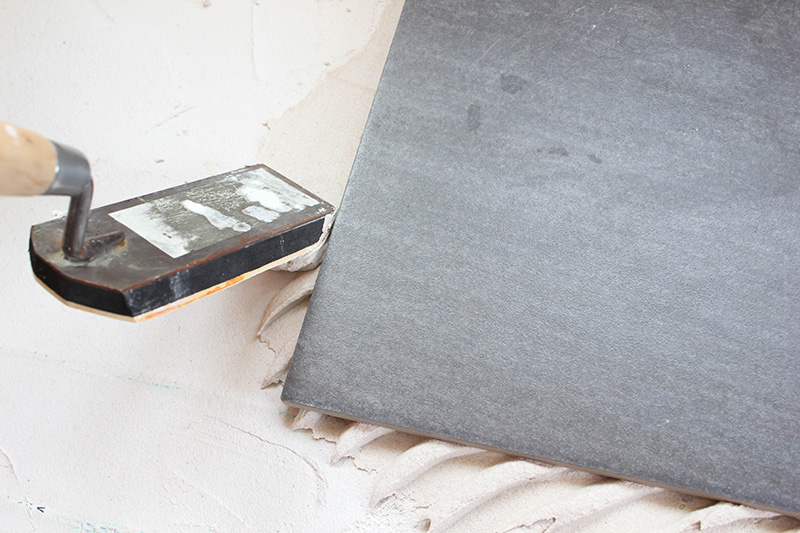
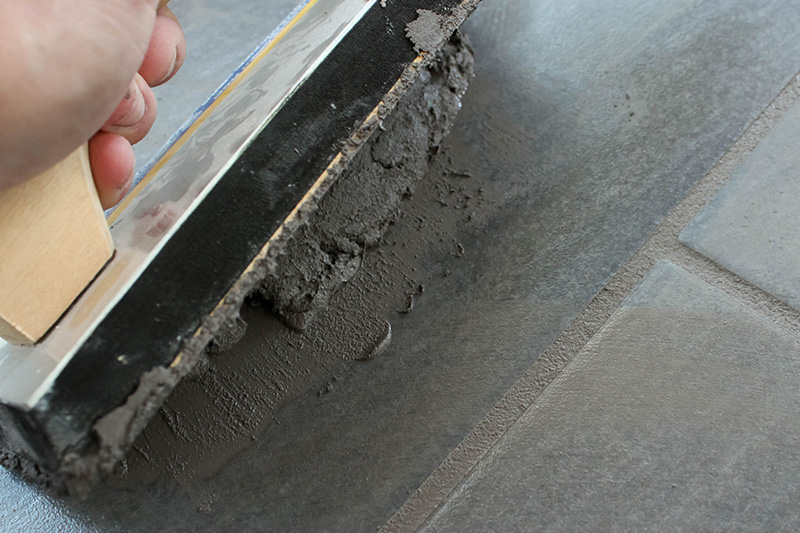
As I mentioned before, mix your mortar to be a little bit on the thick side, and employ a i/2 inch notched trowel to use it to the subfloor where you want your tile. You'll also want to have another smaller, un-notched trowel (called a flat margin trowel) on hand for a few other purposes.
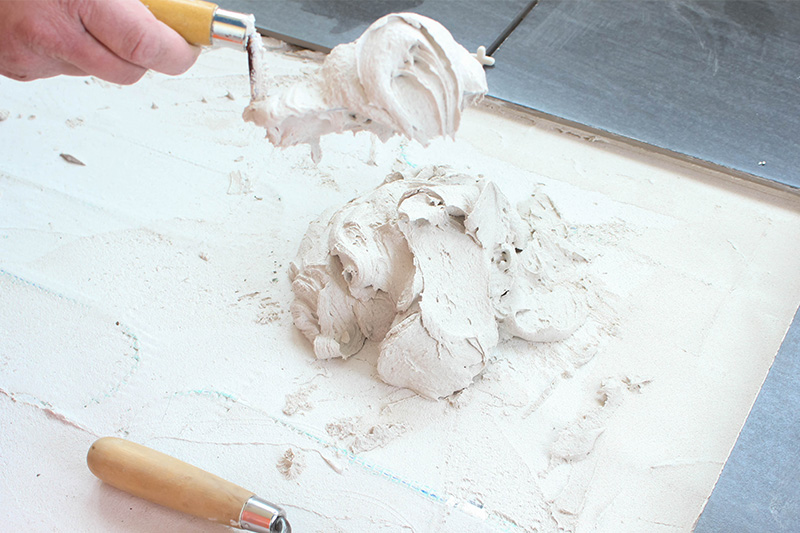
Firstly, yous'll utilize the flat margin trowel to scoop your mortar our of your bucket and place it in a pile on your subfloor before you notch it with the 1/2 inch notched trowel. You'll also want to use this trowel to "back butter" your tile earlier you lot lay it down. You may be used to either back buttering or laying down a bed of mortar, just in this instance, it'south best to do both. Applying the mortar in both places will let the tile to exist suctioned on to the subfloor and will create an incredibly potent bond.
Keep Your Piece of work Clean
Although it seems similar installing large tiles similar these will be a super quick process, y'all really do spend quite a fleck of fourth dimension making certain yous set the tiles down merely correct and ensuring levelness. Past the time you work your way beyond your entire room and come dorsum to where y'all start your rows, any excess mortar that was hanging outside of the area where yous put down your tile volition probably have started to dry. This is true even when you're working in a small room like our mudroom here, so it'southward a skillful idea to accept your apartment margin trowel (use number three!) and remove whatsoever backlog mortar around your tiles before moving on to the adjacent ane. Use a safety margin grout float if y'all're installing over a heated flooring arrangement to prevent impairment to the wire. (See all the tools listed at the end of this mail for a articulate view of the differences between the 2.)
Yous'll likewise give thanks yourself later on if yous keep a grout sponge and a saucepan of water handy to wipe downward the tops of each tile after you lay it down to pick up any backlog mortar that may have institute its mode upwardly there.
Cleaning as y'all get ways you're non pressured to effort to go the chore done quickly (so you can catch that pile of mortar before it dries or clean up any mistakes you made when you're washed) and allows you to have the fourth dimension yous demand to set each tile perfectly.
Installing 12×24 Tile: Grouting
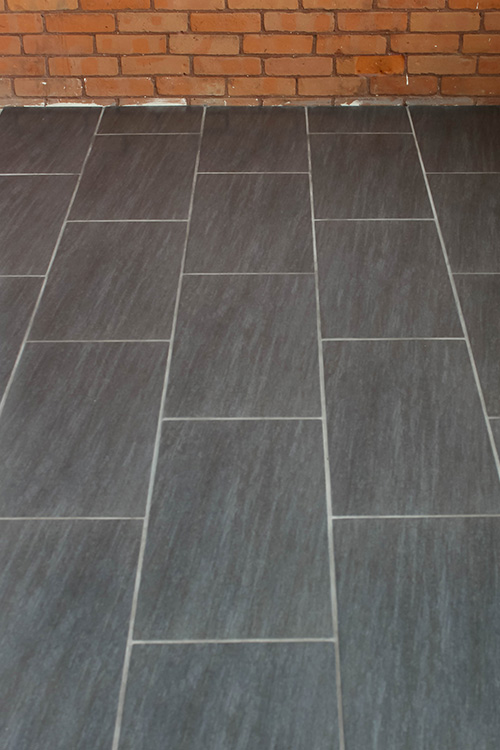
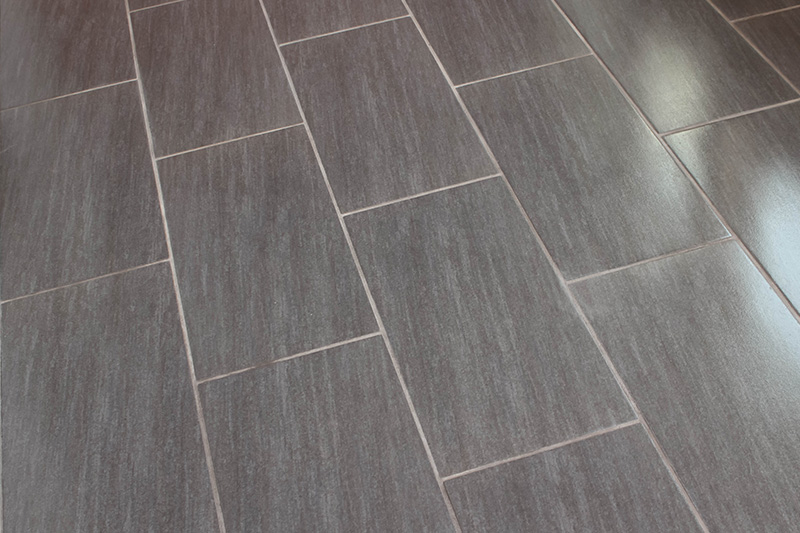
We used 1/4 inch spacers to achieve the perfect grout lines that you come across here and I would definitely recommend using them, fifty-fifty if you lot remember you're pretty comfy with tiling. They only toll a few dollars for a few hundred of them and they make such a departure. We used a sanded grout for this project, which is virtually always recommended for flooring and for larger grout lines because it tends to be a bit stronger than un-sanded grout. Some people mutter that they find that sanded grout tin sometimes attract clay more easily than un-sanded so it's important to remember to seal your grout after it has fully dried. I also recommend using a darker grout color in loftier traffic areas similar this mudroom. It will really make a big dissimilar as to how your tile floor looks later on a few years!
Have you lot installed your own 12×24 tile in your home? Practice you have any helpful tips that y'all would add for anyone looking to install their own tile?
See below for a detailed list of all the supplies that come in handy on a tiling job like this!
What You'll Need
Commencement with a proper base of operations:
 1. Medium-Bed – for big format tile (LFT) 2.Mixing Wand 3. Garden Trowel – for scooping dry textile 4.5-Gal. Bucket
Get the chore done correct using proper hand tools:
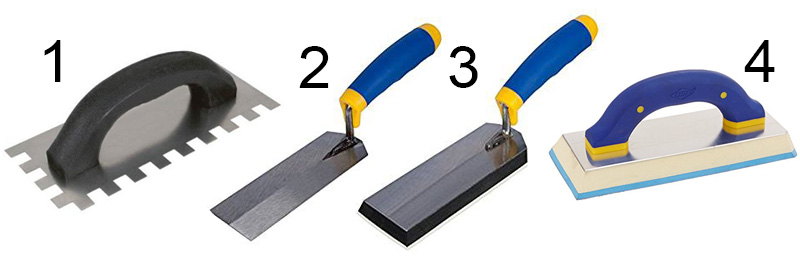 i. 1/two x 1/2 Notched Trowel 2. Margin Trowel 4. Margin Float v. Grout Float
Keep everything straight and level:
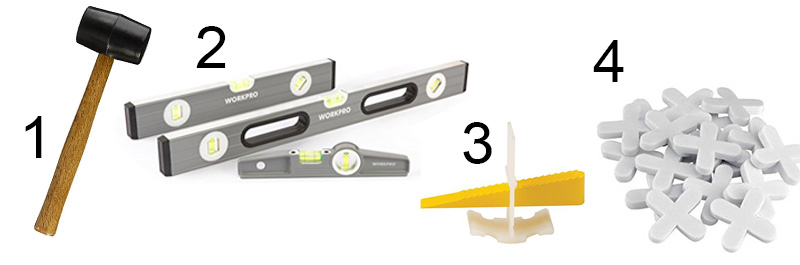 1. Rubber Mallet 2. Large and Minor Levels 3. Lash Leveling Organisation 4. 1/four″ Tile Spacers
Go on your workspace clean:
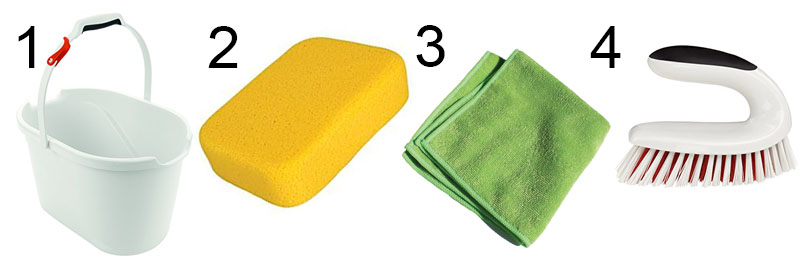 1. Pail – for make clean h2o 2. Sponge – for backlog grout and mortar cleanup 3. Due east-cloth – for grout haze 4. Scrub brush – to clean all your tools
Moisture tile saw:
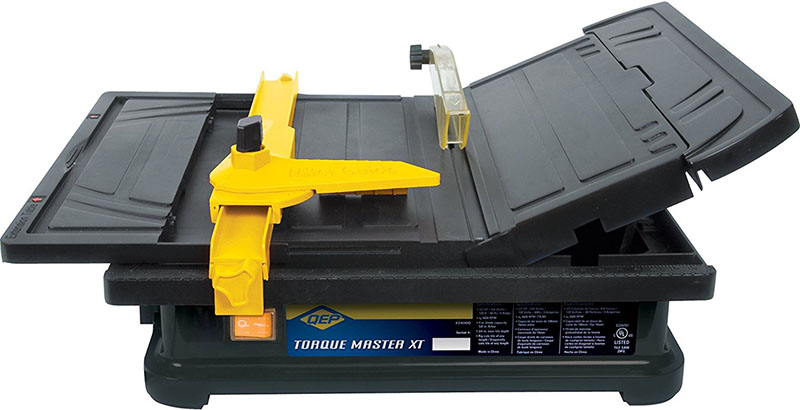
For jobs with many or complex cuts – Wet tile saw
We also installed a really bang-up heated flooring system under this tile (unlike from the final heated floor system nosotros did) and I'll be sharing all the details near that side by side calendar week, then proceed an center out for that mail coming soon! *Update* Yous can find that postcorrect hither!
More TIPS AND IDEAS Similar THIS
- How to Install Heated Tile Flooring (And Also How NOT to)
- How to Paint Former Wall Paneling
- Why We Chose Laminate Flooring Instead of Hardwood
- False Rock Veneer Wall Reveal
- How to Go Rid of Leftover Grout Haze Chop-chop and Easily
- The Creek Line House DIY and Renovating Project Athenaeum

Source: https://www.creeklinehouse.com/everything-you-need-to-know-before-installing-12x24-tile/
Posted by: shumakeritth1973.blogspot.com
0 Response to "How To Install 12x24 Porcelain Floor Tile"
Post a Comment